Posts

Showing posts from March, 2011

Ruffly Ruches!

Image
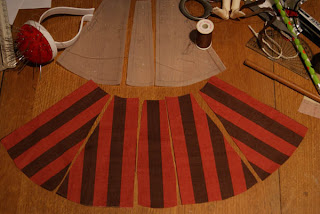
The hemline of the stripey skirt is now finished and nice and straight, so the next bit is to pull up those lovely ruffles! I loosely tacked a line up from the hemline of the stripey skirt at each quarter of the circumference, so there'd be two a the front and two at the back. I made sure the the larger stitch was on the reverse so that you wouldn't see too much of the thread on the outside.  At this point I also tacked a waistband on, folded over both the petticoat and the overskirt waist parts so that they'd be joined together securely while I was trying to get an even effect of the ruches. I'd already made an allowance for a velcro fastening at the back. With a bit of fiddling, I managed to get all the folds in the right places, so then I added these sweet little brassy embellishments. They look a bit like flowers or rounded cogs, so I thought they'd fit quite well. And not only do they look pretty but they also help to keep the folds in place! Th

Next bit: Stripey Skirt!

Image
Having finished the petticoat I made a start on the Stripey Skirt to go on top! I followed the same method with the skirt gores, but kept them full length as per the templates I'd cut before. This was so that I could pull up the skirt in ruches above the hemline of the petticoat. I sewed all the parts together which gave a lovely strong shape of skirt on 'Berry': The hemline is only tacked at this stage, which is why the sewing looks a bit wobbly ;) I was almost not sure whether to continue with the plan of pulling it up in ruches, because this shape is so lovely. I went ahead with it anyway, since I can always remake this pretty easily. So far I've been handsewing everything as the scale is so small, my clumpy old sewing machine would probably just chew it all up like a chomping metal cookie monster :p 'Berry' only measures 26cm (and a large proportion of that is her big noggin!), so you can imagine the scale to sew to is pretty small